Organic gardener growing food and flowers, lovin' pollinators and birds.

Looking back on 2015

The front garden in 2015.
A female black swallowtail butterfly.
The Garden
We experienced a very dry summer this year, which caused me to lose an arborvitae because I didn't water it enough. There was some destruction early on from a family of groundhogs, but using Repellex Systemic regularly encouraged them to move along. (It's a granular deterrent that makes the plants taste bad, but applying it at the right time is key. It won't work if you apply today and the groundhog chomps tomorrow.) But despite the lack of rain, the garden's flowers looked the best yet. Now it's New Year's Eve and we've only had our first coating of (slushy) snow here this week after a very seasonable and warm late autumn into early winter.

It was also a good year for butterflies, with a return of monarch butterflies to the garden and several black swallowtail caterpillars raised and released as butterflies here as well.

The Edible Garden
This year I only kept stats on fruit tree totals. There were 3 pounds of Satsuma plums, 27 pounds of Shiro plums and more than 130 pounds of Kieffer pears! This year I also grew about four beds of garlic as well as several grow bags of tomatoes. Even though the grow bags were propped up on bricks in the driveway, I think it was still too hot for the tomato plants, which didn't produce as much fruit as last year. The only herb I managed to dry and save this year was basil after my oregano appeared to have a fungus.

The Blog
Shiro plums after harvest.
Despite hoping to double my coverage of gardening events in 2015, I only managed to log 12 datelines. (In 2014, I had 26 datelines for this site.) This was directly related to my enrollment in graduate school in May, causing me to have less free time. Needless to say, although the quantity decreased, the quality did not. Among my favorites:

Showy lady's slippers in bloom.
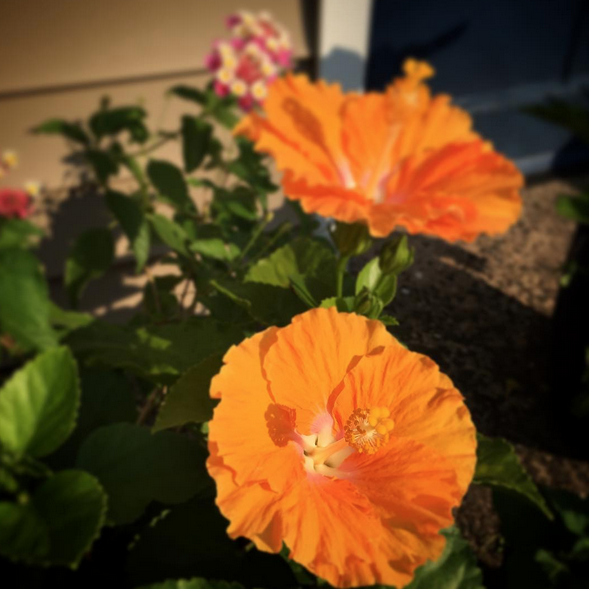
In addition, joining the Garden Writers Association this year helped me make some awesome connections! This year I was able to review some great products, include the CobraHead Weeder and Cultivator and the Patio Party Hibiscus. I'm in the process of additional reviews, including two plant varieties from J. Berry Nursery (the final step for my trial is observing how they overwinter in Zone 6b).

I was also able to visit many more public and private gardens than in previous years, as well as protected nature areas, such as Eshqua Bog in Vermont to see the showy lady's slippers. 

Most of my trips have not yet been featured on this site. Instead, they will be part of a larger blog feature, which will be debuting in 2016. (Stay tuned!) 

How did your garden fare in 2015? What are you looking forward to for 2016?
SHARE:

Product Review: Versatile CobraHead takes chore out of weeding


I really don't like to weed my garden. I am usually ambitious with the start of the spring season, but that usually slides by the time the summer humidity kicks in.

Weeding has always been a chore, one I remember doing in my father's garden with little hand forks to loosen the soil and pull up the weeds. I never knew another way to weed.

But that changed in May when I received a trial CobraHead Weeder and Cultivator to try out in my Northeast garden.

It was immediately put to work in my front and back gardens, which, surprise, were full of weeds. All sorts of weeds. Anyone who follows this blog knows I photograph the garden weekly during the growing season, but I never show you the weedy parts.

I did find weeding to be easier with the CobraHead than when I used a small hand fork. The CobraHead sliced through my soil - even compacted soil areas - with ease. I was able to get the roots out with stubborn weeds, such as crabgrass and dandelions, which really is key so they won't come back.

However, my favorite use of the tool was to remove weeds between cracks in my paved areas. The tool fished out the entire plant - with roots intact as well. Soon I found myself moving around my property, looking for more areas to use my tool: in between stone squares in my patio, along the perimeter of the house where the driveway meets the foundation wall, in a crack caused by frost in the driveway. Everything came out easily without considerable effort on my behalf. Oh, and did I mention that I was no longer dreading going outside to weed?

Another bonus: I've been guilty of leaving my tools out in the garden after I've used them, mainly because I become distracted and forget to put them away. I left the CobraHead tool out during some rainstorms - and you can't even tell.

The tool's blade is referred to as a "Steel Fingernail," and there are many ways to hold it (there are sample videos to watch here). The tool is made in Wisconsin with a forged and tempered steel blade and a handle that is created from recycled polypropylene and organic fibers. The tool can be purchased through the company's website for $24.95, which includes shipping.

CobraHead LLC supplied with me the CobraHead Weeder and Cultivator to trial.
SHARE:

A true Christmas rose this year

Shared from my Instagram account.

Yesterday I stumbled upon a hellebore in the garden getting ready to bloom. We've had a very mild fall so far, with warmer than normal temperatures. The ground is not frozen yet, and I've been still tucking in a few minor bulbs here and there when I get the chance. In fact, I only dug up my dahlias about a week ago, due to my hectic schedule! (How lucky am I that the weather is cooperating!)

I've never seen any of my hellebores bloom this early, despite reading that they are commonly known as Christmas roses, due to their proximity of blooming so close to the holiday. I'm so glad that I've planted this one so close to the patio, which made spotting it so easy!

Do you have any hellebores blooming in your garden at this time?
SHARE:

Honey Pear "Baklava"

I've been brainstorming a new, original recipe for weeks now, and I think this Honey Pear "Baklava" is the sweet dessert I've been hoping for! (Confession: I tried this recipe out on my garden club, and it went over so well that I decided to share it here!)

First, a little background. This growing season produced 130 pounds of Kieffer pears in my garden - that's a record breaker! As a result, I've been trying to come up with several different ways to use up my pear abundance, including gifting pears to friends, coworkers and relatives. Additionally, I'm a pastry chef, and when I used to work in the bakery full time, I would regularly be responsible for making baklava, a delicious Greek dessert. Not only did I enjoy making that dessert, but I loved to eat it as well.

However, traditional baklava calls for nuts. I have plenty of friends who either don't care for nuts or are allergic to them, so I wanted to make my dessert nut-free, hence the quotation marks for baklava in the title of Honey Pear "Baklava." It looks like baklava, but, in my mind, it's technically not due to the lack of nuts.

The finished product: Honey Pear "Baklava"

Anyway, I digress. Here's how you can make this delicious, sweet dessert.

Filling:
6 pears, peeled, thinly sliced (I used Kieffer pears but any ripe pears will do)
2 ounces of sugar
1 teaspoon of cinnamon
1/4 teaspoon of cloves
1/4 teaspoon of mace

For assembling:
One roll of fillo dough (phyllo pastry sheets), found in the grocery store's freezer case. Let this defrost in the fridge before using.
1 pound of butter
A 13x9 pan

Syrup:
5 ounces of sugar
6 ounces of water
3 ounces of honey
A good squirt of lemon juice
1 small cinnamon stick

Time:
The prep time for me took about an hour, which included peeling and slicing the pears.
The cook time is about 60 minutes.

Steps:


1. First, remove the fillo dough from the fridge and let it start to come up to room temperature. I don't unroll it immediately because it will dry out and be more prone to breaking.

2. Take the butter and put it in a pot on your stovetop at the lowest heat setting. You want to melt it but not burn it.


3. Next, peel and slice your pears. I found the easiest way to do this is to peel first, then cut a little off the bottom of the pear so it can stand upright without falling over. Then cut into fours, getting as close to the center as possible. If you get a little bit of the core in your slice, you can use a melon scooper to scoop it out. Cut it as thin as you dare.


4. Put your sliced pear pieces in a bowl ...


... and add the spices and sugar.


5. Now you can unroll the fillo dough that has been warming up on the counter. Take your pan and melted butter, and brush some of the melted butter so it coats the bottom of the pan. Take a piece of fillo dough and place it on top. Then brush with melted butter again. Repeat this eight times. If the fillo dough breaks, I use it anyway, just trying to make the ends line up.


6. Take your pears and put half in the pan. Try to spread it out evenly, being careful not to spoon the excess liquid on as well. (The sugar begins to break down the pears, which causes it to start to liquify.)  Take another piece of fillo dough and place it on top. Brush with butter. Do this five more times.


7. Put the remaining pears on top, again, being careful not to add any additional liquid from the bowl. Add the next layer of fillo, brush with butter, and repeat until you run out of dough. This will vary with each package, but I use it all up. When you run out of dough, put the tray in the fridge to firm up for about 10 minutes.

8. Now start your syrup. You'll put all the ingredients in a pot and cook on low heat on your stovetop. You just want to bring it to a boil. Once it begins to boil, remove it from the heat and let it cool.


8. Then I take the pan back out of the fridge and cut it as shown above, 6 rows long by 4 rows wide. I take my knife and cut it diagonally through each square piece. I cut the dessert at this point before I bake it because I find it harder to slice afterwards.

9. Cover with foil and bake at 350 degrees for 40 minutes. After the 40 minutes, remove the foil and bake it for an additional 20 minutes, or until it is "golden brown delicious" as we said in culinary school. It is ready when it looks like the photo below.


10. Let the dessert cool for roughly 10 minutes. Then take your cooled syrup and pour it on top. Depending on how "wet" you like it, you could use some of it or all of it. I don't like mine too wet, so I "eyeball it" (a term pastry interns used to hate for me to use!).

Using a knife, recut the pieces. If you have an offset spatula (which is commonly used for cake decorating), you can use that to take the pieces out of the pan. (A cake server would work as well.) I like to place each piece in a cupcake wrapper for presentation. 


I think it tastes best when it's still warm. The combination of the honey syrup with the pears is divine. Enjoy!

Edited and updated on June 15, 2020.
SHARE:

Wrapping up the garden

I've been extremely lucky this fall. It's almost Thanksgiving and temperatures are still averaging in the 50s and 60s during the daylight hours. Which is fantastic because I am behind on bulb planting season!

What was unusual this season as opposed to others is that I was immune to bulb shopping for most of the fall. I was able to walk by displays promising brilliant colored tulips, daffodils, crocus and more without even a pang of "I must have this!" urgings.

(Obviously, I must have been ill.)

And then I took one trip about two weeks ago to one of my local nurseries - Natureworks - and saw the sign: 25 percent off all spring bulbs.

Scilla Siberica Spring Beauty

...

Uh oh.

Ok, I'll start with a few crocus, I thought. I started to bag up not one, not two, but three different varieties of crocus. Then I was shown some leftover tulips from landscaping projects that weren't put out yet.

Sure, I'll take a few of those, too.

And then, it was done. My period of bulb-lessness ended and I was sent home with crocus, tulips and scilla.

It didn't end there. In my inbox at home was an email from Van Engelen Wholesale Bulbs. This time, select bulbs were 40 percent off.

Forty percent! Well perhaps I need some more tulips. And definitely more crocus. And how about some more scilla - those are supposedly rodent-proof.

The order was placed, and within two days, they were here. Since then, I've been slowly chipping away at planting my bulbs in the garden. I've been adding crocus and scilla underneath my hellebores. I've been planting a large swath of scilla siberica 'Spring Beauty' among my hosta bed in the back garden. Still to plant are all the tulips I've purchased between the two garden suppliers.
Crocus 'Pickwick' from previous years in my garden.

So what made the cut this year? I've picked up an assortment of crocus species, but I bought the most of the crocus tommasinianus 'Ruby Giant.' Other varieties included 'Pickwick,' a beautiful large crocus that used to grow in my front garden until the voles discovered them last winter; crocus 'Orange Monarch'; and crocus 'Jeannine.'

For tulips, I purchased 'Kingsblood' through both garden suppliers, a nice deep red tulip that I'm going to interplant with the 'Flaming Parrot,' which should both bloom in May. I also purchased 'American Dream' and 'El Nino' through Natureworks, which I plan to put in one of my raised vegetable beds (soon to be cut flower garden next year).

Will they come back the following year? I have no doubt that the crocus and scilla should. (I've had lots of luck with daffodils too, even though I didn't buy any new ones this fall. They don't like wet feet though.) I've had hit or miss luck with the tulips. They are pretty fussy for me, not liking too much water in their dormant season or they have been gobbled up by the voles. I used to not purchase tulip bulbs because they had such a poor return rate, but now I view them as annuals. If they come back, bonus. But I plan on them not returning.

And besides, what's a spring with cut tulips?

So with a little luck, the mild autumn weather will hold up long enough to get all these bulbs in the ground!

What are you planting - or have you planted - this fall for the spring garden?

SHARE:

Wordless Wednesday: Frosty morning

Coneflower seed heads.

Gazing globe with mums in the background.

Feverfew leaves with frost.

Global Warming mums with frost.

Hellebore leaf.

SHARE:

Pear Jam

With so many pears produced this year - more than 130 pounds - I've been trying to find creative uses for all the pears I haven't gifted away.

So, when I found this recipe for Spiced Pear Jam from Taste of Home, I thought it would be a great project.


I used about 16 medium to large sized pears for this batch (it calls for 5.5 pounds chopped up). I also accidentally used nutmeg instead of cloves when I made this for the first time, but the results were still delicious. It reminded me of cooked apple pie filling in the beginning, and it took a bit longer than the directions said it would to bake down.


But once it reached jamming stage, it was a beautiful color with a appetizing aroma. It made a little more than 12 jam jars once I processed it. The second time I made it, I used half pint jars, and it made enough for a little more than six. The second time I made it, I also put in the cloves as the recipe directs, not the nutmeg.

Are you still enjoying the fruits from your garden?
SHARE:

Sneaky Autumn

Somehow autumn has crept into the garden and the first frost has taken away the tender annuals more than a week ago. Fall cleanup is a slow process for me this season, and I've been as absent in the garden as here at Frau Zinnie due to graduate school classes keeping me on my toes.

This weekend daylight savings time will end and we will be plunged into further darkness earlier in the day.

Although the majority of blooming flowers have finished their show, there's still beauty in the garden for those paying attention.

It can be seen in the way the light glows through a seed pod.

Butterfly weed seeds.

It can be seen in the hues of late-blooming mums.

Global Warming Mum.

And it can be seen in the soft light of the setting sun that tenderly kisses the flowers before dipping below the horizon line.

Clara Curtis mum.
As I move forward in my life as a gardener, I'm reminded yet again for the need of better time management. Do you have time management tips that apply well to the garden? My new mantra is a little everyday: because a lot of little steps make a difference in the long run.
SHARE:

Berries for Birds and Seed Giveaway!

UPDATED on 10/5/15:
I believe I made the contest too difficult the first time I posted so I removed the bird identification portion! The contest will now run through Saturday, Oct. 10! Good luck!

I was out in the garden on this very cool morning and I noticed my berry-producing shrubs are in their glory right now! I've been adding bird-friendly shrubs to the garden in the last few years and this is the best year for berry production so far! So to celebrate, I'm hosting a giveaway!

Woohoo!

To enter, sign up to receive Frau Zinnie via email (to the right of this post). Then submit a comment below that (1) identifies the four berries in the photo, (2) the birds who eat them, (3) that you have signed up for emails and (4) a way to contact you if you win. I will take all the correct answers, put them in a hat, and pick out two winners.

Here's your clue:

Can you correctly identify all four berry shrubs in this photo?

The prize? Calendula seeds harvested from my garden for planting next spring! Here's what they will look like when they bloom:


The contest runs through 5 p.m. EST Friday, Oct. 2, 2015. Updated: Now through Saturday, Oct. 10! Good luck!

This contest is closed.
SHARE:

Floral Friday: Last Weekend in Summer

I'm a little late posting this past Floral Friday post (for Sept. 18)! But I wanted to make sure I chronicled what was blooming and producing in the garden this week: lots of fall flowers and berries for the birds!

The butterflies love the asters.

The pears are ready for picking!
To learn how to know if pears are ready for picking, click here.

Finally! Zinnia blooms!

This hibiscus is one I nursed back to health after it had a rough winter indoors.


Winterberry for the birds.

It's time for mums!

Beautyberry

The beginning of the pears being harvested.
Follow me daily online via Twitter and Facebook! To view last week's Floral Friday, click here!
SHARE:

Patio Party Hibiscus Offers Outstanding Color, Variety


Want to make your neighbors envious of your entryway?

First to Arrive in direct sunlight.
(From my Instagram account.)
Then it's time to add the Patio Party Hibiscus line to your gardening repertoire.

But be prepared for that long, lingering gaze from across the fence. I know, because it happened to me. When my neighbor's flowers were succumbing to the heat, my two Patio Party Hibiscus just kept blooming.

Needless to say, I've been delighted with the two hibiscuses I was able to trial for J. Berry Nursery this growing season. I've grown tropical hibiscus in the past with average results. Usually I bring them home from the nursery and they look great, but then as the season goes on, they tend to peter out.


This photo was taken in the same day. On the left was the
flower in the morning. The right shows how the color
intensified during the day, and held up to a rain storm.
(From my Instagram account.)
The Patio Party line has been blooming consistently for me, even in the hottest temperatures with very humid conditions. I've shared photos of the blossoms through my Instagram account throughout the growing season (13 weeks, beginning in June). I noticed the plants also kept their flowers longer than my other hibiscus I regularly grow. (In fact, when my yellow hibiscus was already curling in its petals for the night, Patio Party Hibiscus First to Arrive was still wide open.)

The plants did not attract any pests in my garden: the leaves and flower petals remained unblemished. One of the best features was how the flower color intensified throughout the day (as seen in the photo of Party Crasher at right).

Of the several varieties in the Patio Party line, I was able to trial First to Arrive and Party Crasher.

I'm not usually a fan of orange flowers, but Party Crasher totally won me over. The plant tag that arrived with the plant even warned me of this: "Party Crasher is fun and vivacious: she may not have been invited but you couldn't imagine the party without her."

Patio Party Hibiscus Party Crasher loved the sun.

Multiple blooms in the setting sun.
(From my Instagram account.)
The bright clementine-hued flower - with a center that varies from white to pink - ranges in color intensity. The flowers shrugged off rain - even heavy rain. During the very dry late-summer weather we experienced in Central Connecticut, I did have to water the plant almost every day. It also bounced back more quickly than my other container plants. I included Party Crasher in my late-season fertilizing routine to increase blooms (I used Espoma's organic Flower Tone). The plant responded quickly to this nutrient boost and sent out even more flowers: sometimes there were three or four flowers blooming at once. My plant stayed fairly compact growing in a blue glazed ceramic pot in direct sun. I combined the plant with lantana, which turned into a pretty, colorful combination.


Patio Party Hibiscus First to Arrive. (From my Instagram account.)
First to Arrive has slightly larger
flowers than standard tropical hibiscus.
(From my Instagram account.)
The second variety I tried was First to Arrive, and honestly, photos do not do the plant justice. The red is so deep, so dark, that I have trouble replicating it in digital photography. It is a knockout flower when it blooms. Again, one of the features I was most impressed with was its ability to withstand heavy, torrential rain. When my plants (think dahlias) were pelted, First to Arrive merely shrugged at the rain: Is that all you've got? It also benefited from the late season addition of Flower Tone.

The flowers are slightly larger than my other standard tropical hibiscus I grow (as seen at left). The plant tag that arrived with First to Arrive stated that it "loves to see and be seen: she is confident, classic and prefers to lead, not follow." It even made my worn-out blue garage door look like the perfect backdrop for its brilliant petals.


First to Arrive glams up the garden.
The Patio Party plants are the result of five years of breeding by Jim Berry, co-owner and developer of the Patio Party line for J. Berry Nursery. With names like Hot Head, Queen Bee and Social Butterfly, a gardener would expect the flowers to be flashy and exciting. First to Arrive and Party Crasher provided color in my container garden area when my other plants began to fizzle and die back (for me, it was mainly petunias and salvias that fared the worst). I do plan on bringing the plants indoors for the winter, since the Patio Party line is only hardy to Zone 9 and I live in Zone 6b. After I overwinter them, I plan on transplanting them to larger containers to see if they will increase in size.

*J. Berry Nursery supplied me with two plants to trial this growing season: First to Arrive and Party Crasher.
SHARE:

Floral Friday: Bring on the Rain and Cooler Temperatures!

It seemed like forever since the last major rainfall in our area. We were even experiencing a moderate drought in Central Connecticut. And then - the rain came this week and you could hear the plants sigh with relief.

Pear tree catastrophe!
The pear tree unexpectedly snapped a heavy fruit-bearing branch this week, which sent me into triage mode. The tree was previously supported with one stake and bungee cords, but apparently it needed more. I was able to balance the heavy branch on an empty, unused garbage can (it's suppose to turn into a rain barrel eventually) and then I duct taped the branch back together. I realize that I may lose the entire branch, but I am hoping to at least harvest the fruit before I have to make that decision. So far, so good: the leaves on the broken branch have not wilted or turned brown yet.

Other pears look OK!

Throughout the front garden is a sprinkling of color:

Asters are beginning to bloom in the garden.

More asters brought home for containers.

Ornamental cabbage for containers (from my Instagram account).


The Patio Party Hibiscus - First to Arrive - is still blooming like crazy. (To read a review on this line of plants, click here.)

This bush clover (lespedeza)  is really brightening up the border between my
property and my neighbor's driveway. It grew so much since last year! 

Matching the color is the massive border of anemones, which attract bees
and butterflies to the garden. 
And in the back garden:

The morning glories are blooming along the shed.

The last of the tomatoes are starting to filter in.

This Rose of Sharon was a stowaway from another plant I had purchased two years ago.
I transplanted it from the original site and it seems pretty happy along the fence in the back.
What is growing in your garden this week? To view the last Floral Friday, click here.
SHARE:
Blogger Template by pipdig